Adjusting the brakes on an electric bike is very important for all-electric cyclists, especially those who have mechanical brakes
Mechanical brakes are one of the most common types of brakes in electric bikes in the small and medium category, and this gives them widespread.
But with this spread comes some effort required to adjust the brakes from time to time.
We all want that bite that we feel when you pull the brake lever and try to make the brakes always have a high level of force.
On the other hand, the hydraulic brakes on an electric bike require very little effort to adjust.
In this post, we will explain the correct guide to adjusting the mechanical brakes, as well as some adjustments that you can make to the hydraulic brakes.
How To Adjust Electric Bike Brake?
We will start with the mechanical brakes first since they are the most in need of adjustment.
In order to get a distinctive performance from the mechanical brake, you must adjust each part separately and then wear out the harmony of the adjustments with each other.
But before we get started, let’s first find out how the mechanical brakes work on your electric bike.
How do the mechanical brakes work on your electric bike?
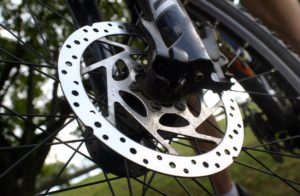
As a general rule, mechanical brakes operate using a cable whose beginning is connected to the brake lever, and its end is connected to the brake caliper lever.
When you pull the brake lever, you are pulling the cable connected to the caliper, which leads to the entry of the Otter Pad in order to squeeze the rotor between the Otter Pad and the inner Pad, knowing that the inner Pad does not move.
After we have explained how the mechanical brakes work, we will make an adjustment for each part of them separately
Check out these Excellent brake Pads on amazon From Here
Used Equipment
Adjusting Mechanical Brake
1- Adjusting Cable Tension
The purpose of this adjustment is to tighten the cable to the maximum to ensure a quick reaction when the brake lever is pulled
- Loosen the cable screw a little
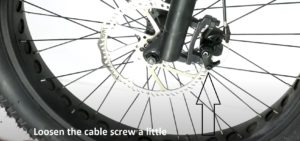
- Tighten the cable with your hands, make sure it is tight, then tighten the screw again while you tighten the cable.
Note: The cable must be tight, but do not tighten it too much so as not to damage the cable.
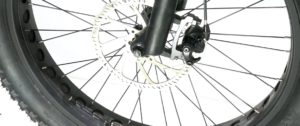
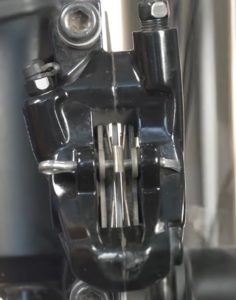
2- Adjusting the mechanical brake Caliper.
The goal here is to adjust the caliper so that it is in the center on the rotor.
- Loosen the caliper screws a little
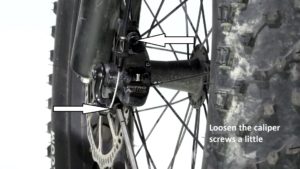
- Press the caliper until the rotor connects to the brake pads, then tighten the bolts lightly
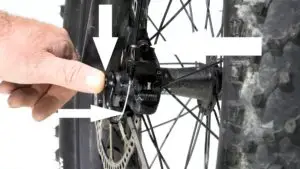
- Make sure there is a good distance for the brake pads.

- The next step is to lock the rotor in position. To do this, pull the brake lever and tighten the screws well while pressing the caliper.
Note: You may need help from another person during this step, or you can attach the brake lever with any rope during this step.
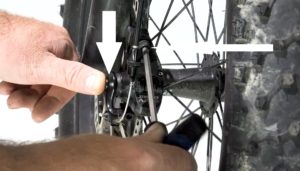
3-Inside pads adjustment
The goal of this step is to ensure that there is a very small distance between the inner bush and the rotor (The distance should be very small, not more than 3 mm).
To do this, tighten the screw of the inner hill adjustment very well, then start loosening the screw a little, and then turn the tire. If you hear a friction sound, loosen the screw a little again until the sound disappears
4- Adjusting the brake lever pull
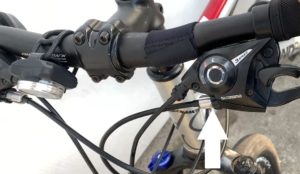
The goal of this step is to determine when the brakes will work when the lever is pulled, and you can adjust here according to your desire
In most electric bikes, the Parallel Switch adjusts the timing of the brake action when the lever is pulled.
If you have small hands, you can adjust the brake action when the brake lever is near the handlebar
If your hands are large, you can adjust the brake action when you are in the middle of the distance or a little further from the handlebar.
All you have to do is to turn this switch clockwise in order for the crane to start working near the hand bar.
But if you want to apply the brakes when the lever is far from the handlebar, you can turn the switch counterclockwise.
Adjusting Hydraulic Brake
Adjusting the hydraulic brake does not require many steps, as we mentioned earlier, for the way the hydraulic brake works, which works as a tightly closed system, but if you hear a sound while riding the bike, there are some simple steps that you can take.
- loosen the mounting bolts
- Pull the brake lever
- Attach the mounting bolts while holding the lever
- Twist the tire of the electric bike to see if there is any sound or not
If the sound continues, you will need to unscrew each bolt one unit and then tie it until the sound disappears
.Check out this 180mm ebike brake rotor on Amazon From Here
Note: The steps for adjusting the rear hydraulic brakes are the same as the acceleration steps in the front brakes
Conclusion.
As a general rule, you can adjust the mechanical brake by adjusting the Cable Tension, then the brake caliper, and then adjusting the inside pads.
The hydraulic brake can be adjusted by loosening the mounting bolt, then pulling the brake lever, then tightening the mounting bolt while pulling the lever.